Ring control guide
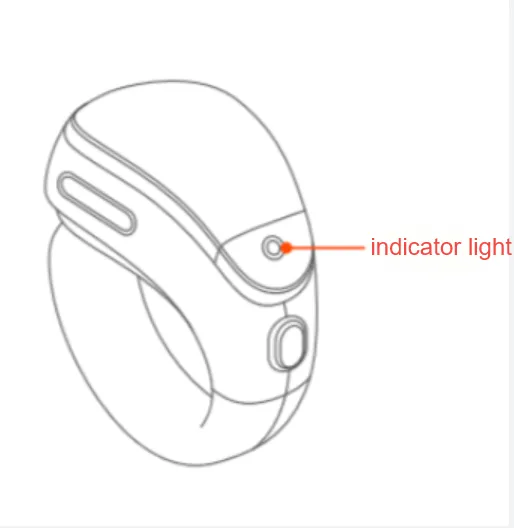
Part 1 Ring Indicator Light
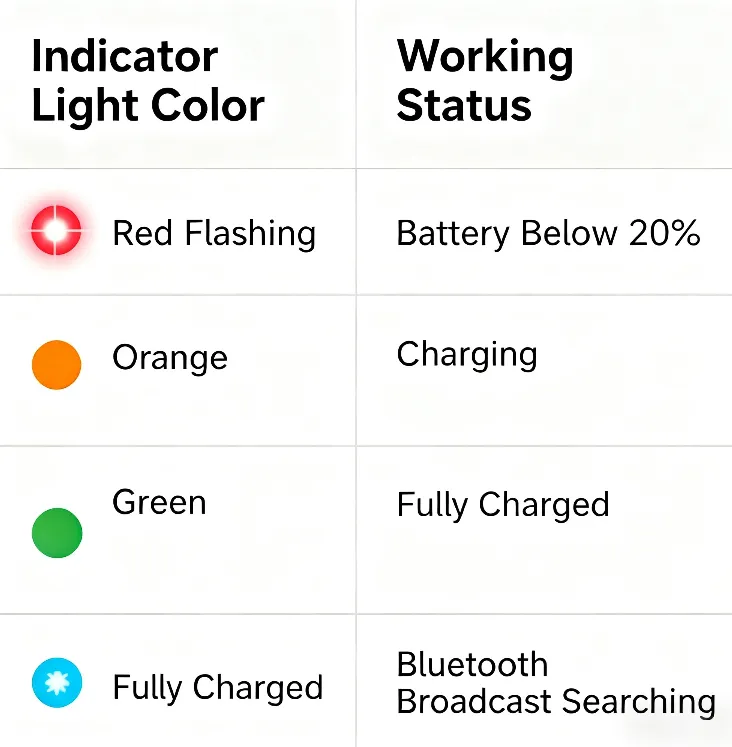
Section titled “Part 1 Ring Indicator Light”The following table shows the correspondence between indicator lights and their statuses.
The ring is paired successfully, and the indicator light turns off.
Part 2 Basic Interaction Instruction
Section titled “Part 2 Basic Interaction Instruction”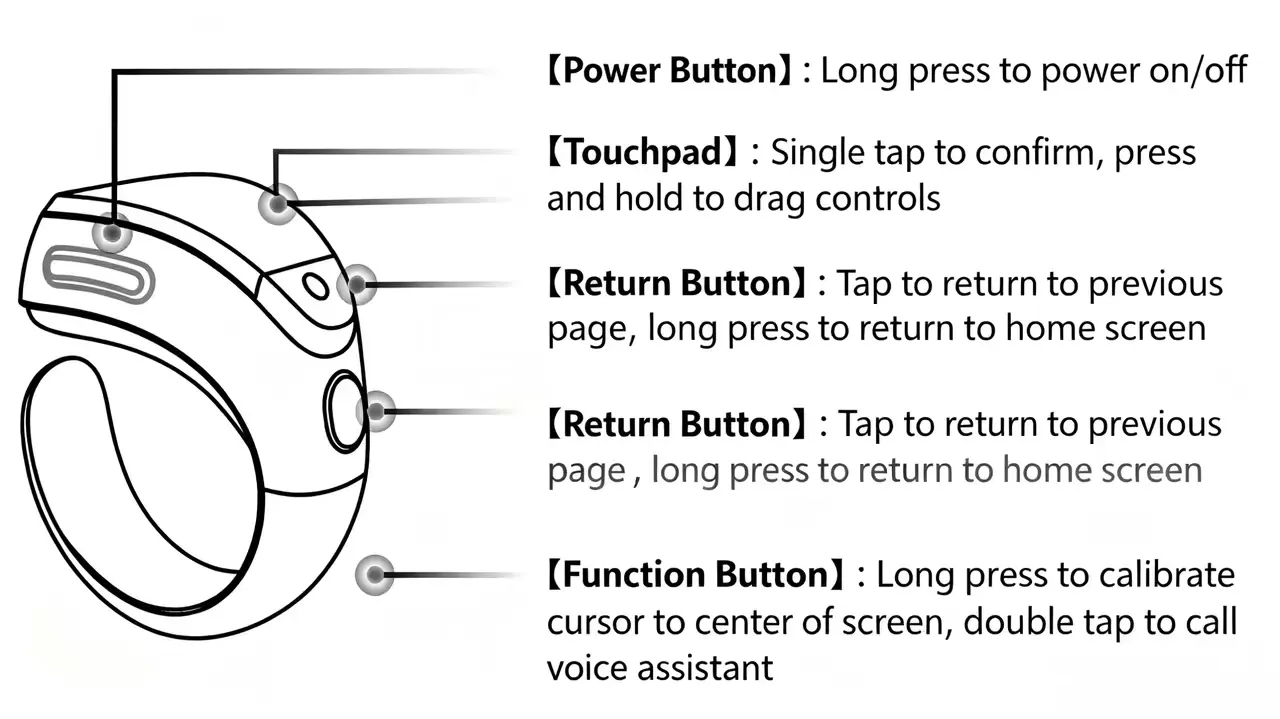
Part 3 Ring Pairing
Section titled “Part 3 Ring Pairing”First Connection of the Ring
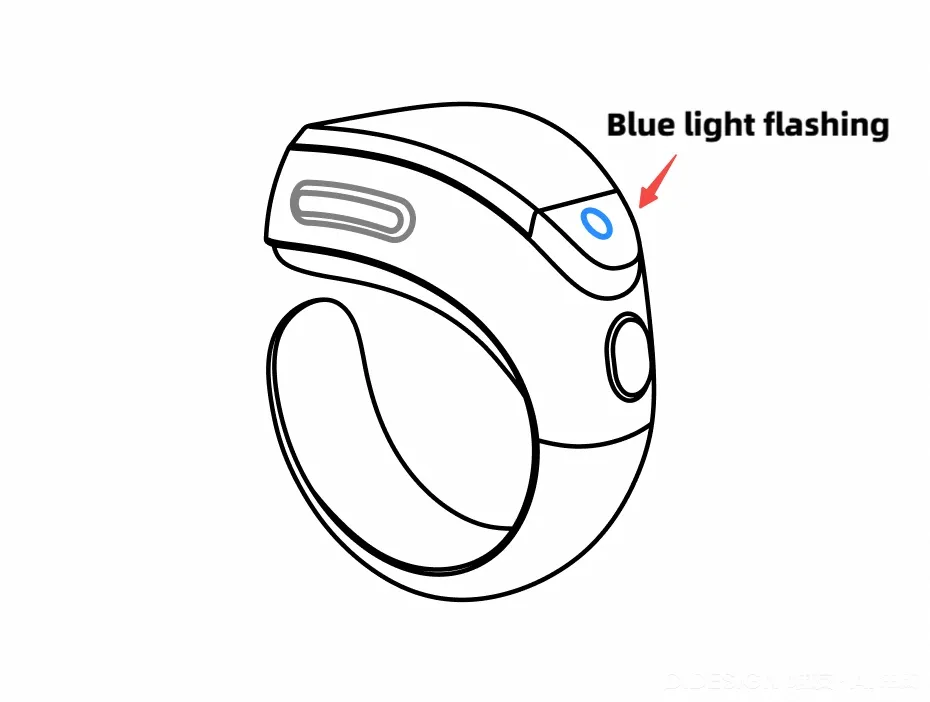
- Follow the new user guide to connect the ring. After long-pressing the ring’s power button to turn it on, the ring’s blue light flashes, and the ring enters the scanning and pairing process. When the pairing is successful, the indicator light turns off.
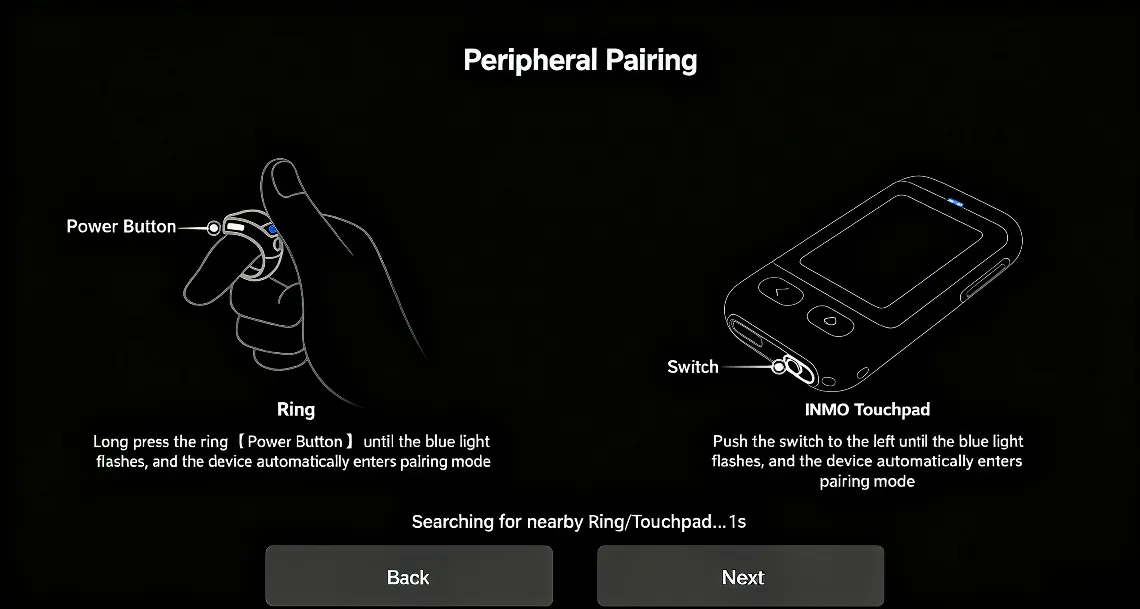
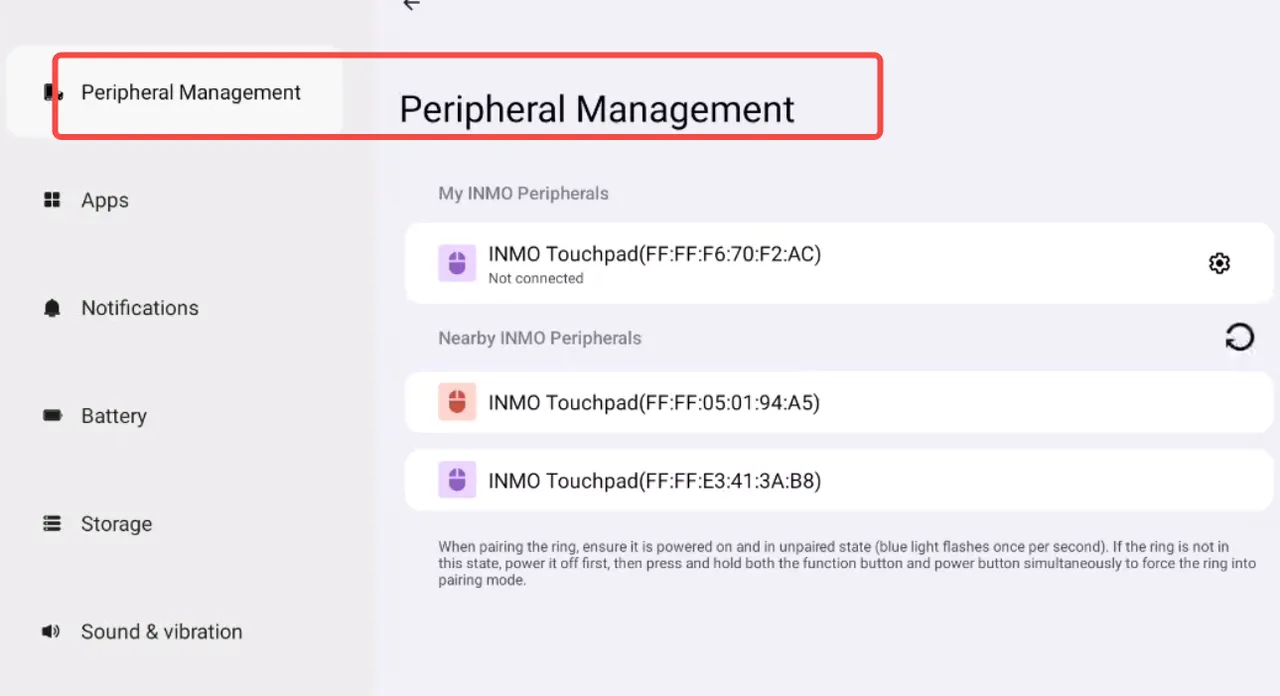
- If you skip the new user guide and don’t connect the ring, go to the glasses desktop -> Peripheral Management -> Click and search.

- Then you can find the “INMO Ring 3” device, and click to connect.
Note:
-
If the ring disconnects during use, it will automatically reconnect.
-
If the automatic reconnection fails, go to the glasses desktop -> Peripheral Management -> tap “INMO Ring 3” to connect.
-
If the connection fails repeatedly, you can first unbind the ring on the “Peripheral Management” page.

- Long-press the ring’s power button to turn it off, then long-press both the power button and function button to turn it on (reset).
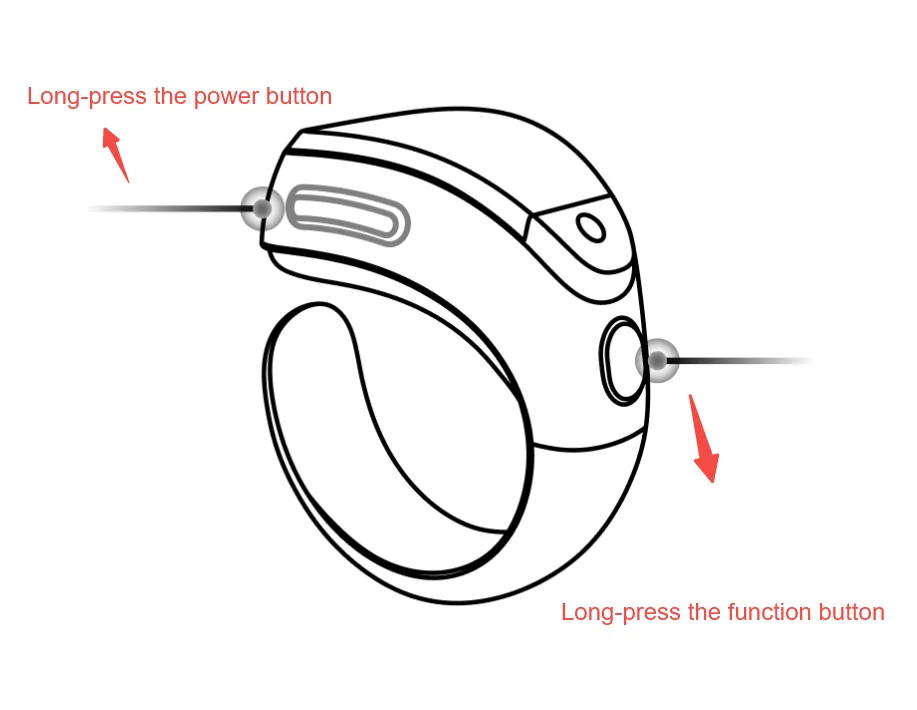
Wait until the ring’s blue light flashes rapidly.
- Go to the glasses desktop -> Peripheral Management -> tap and search, then you’ll find the “INMO Ring 3” device. Tap to connect.
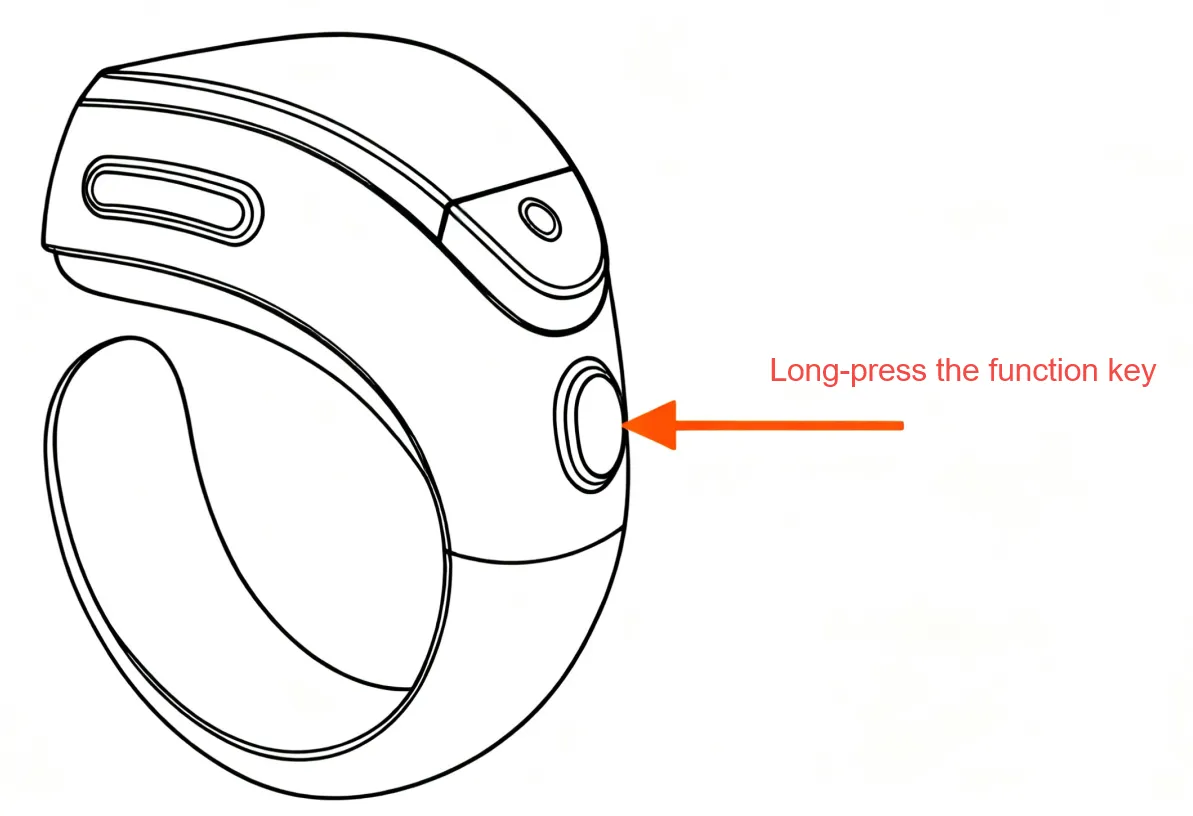
Part 4 Ring Indicator Light
Section titled “Part 4 Ring Indicator Light”Long-press the function key on the ring to calibrate the cursor/ray to the center of the screen.Note: The ray function can only be used when entering [Spatial Multi-Screen/Discovery]